
Integrating different systems with your Business Central is the best way to be able to get the most out of your IT platform, however, once you have a certain amount of integration it can become challenging to maintain, because while Business Central does have the ability to be customized so that it fits our every need, you will very fast run into the question, whether or not all of this functionality and responsibility should be placed inside your ERP system, and once you ask yourself that question you already know the answer, which is no. One of the main problems that we face when creating integrations is what should happen if we try to send our data but the service that we are trying to reach is down or for some reason does not accept the request at the time when you are trying to send data to it, what should you then do? Let it fail? or try again? and if you choose to try again, how many times should you try? This is where the Azure Service Bus comes into play.
Azure Service Bus
Azure Service Bus has two main functionalities, the first and most used is the message queue.
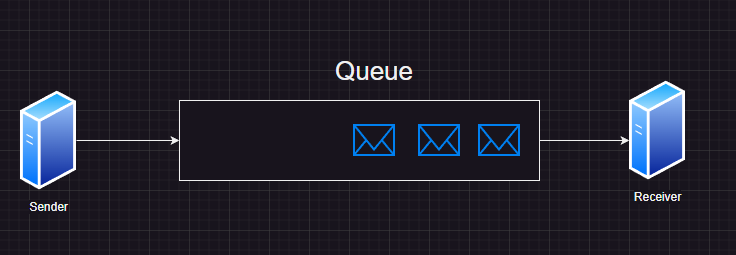
The concept behind the message queue is that the sender will send their requests to Azure Service Bus which will then send them to a receiver, and if the receiver for some reason cannot receive the message, then the message will be queued until it is ready, or if the receiver returns an error the message the service bus will then be able to retry, or it can place the message in a dead letter queue, which someone of something can monitor, the idea is to remove the tight coupling between the sender and the receiver, this also means that if your systems require a tight coupling then a service bus is not the right solution for you.
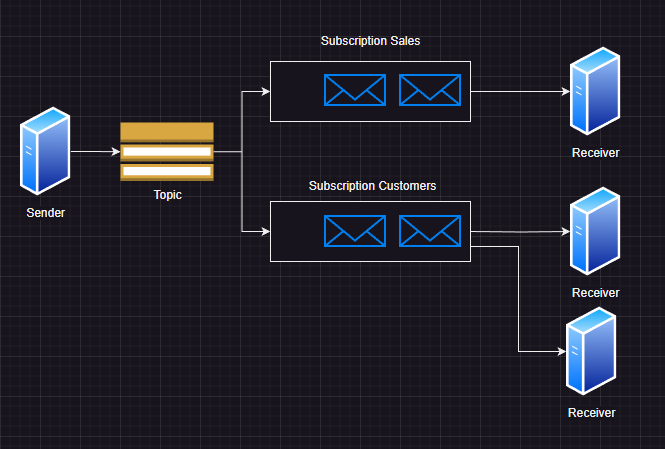
The second feature of an Azure service bus is the concept of topics, this is where your messages will be put into different queues depending on a topic that you choose in your message, from the sender side everything will work in much the same way apart from the fact that you must add a topic to your message, however on the receiver side things work a little different because when using topics then the receiver must subscribe to a given topic, and when a message is created on the queue with a topic that the receiver has subscribed to, then the receiver will receive that message, the main difference between using topics is that a simple Message queue is a one to one relationship where you have one queue and one receiver, while if you use topics it becomes a one to many relationships because you can have multiple receivers that subscribe to the same topic.
Setting up an Azure Service Bus
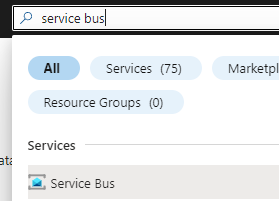
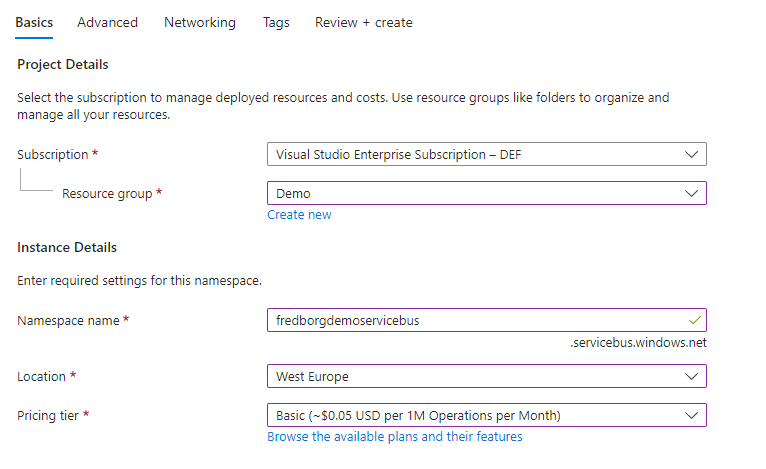
To set up an Azure service bus, you must go to your Azure portal and search for service bus.
Press Create
And fill in the information (Basic does not give access to Topics):
Once your resource has been created, head to Queues and create a new Queue.
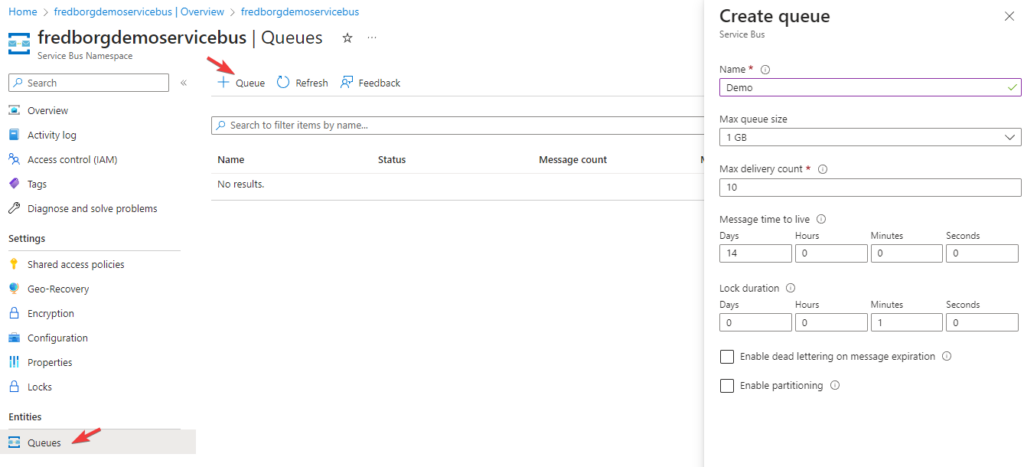
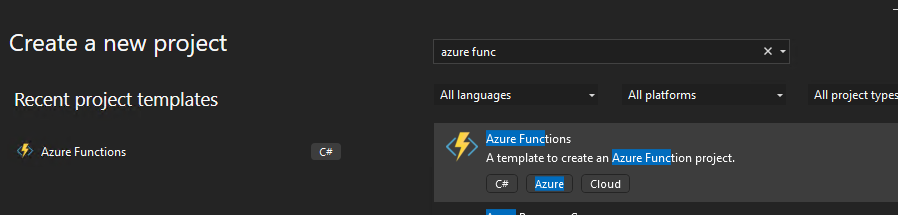
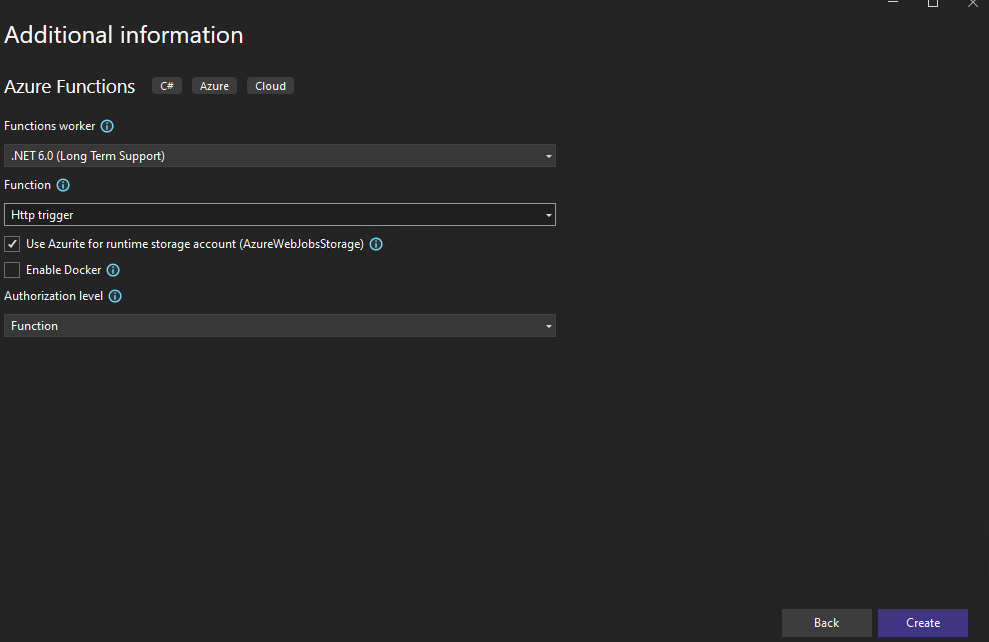
I am going to leave everything as default, but this is where you are able to control how your queue should work, including if you wish to enable dead lettering, which I would suggest that you do when setting this up in a production environment. Next, we need to head over to our development environment. I will be using Visual Studio and C#, and I will also be using Azure Functions to interact with my queue. If you do not have Visual Studio you can download the free community edition here I will be using a Http triggered Azure function in this example.
Next, we will need to install a nugget package called Azure.Messaging.ServiceBus

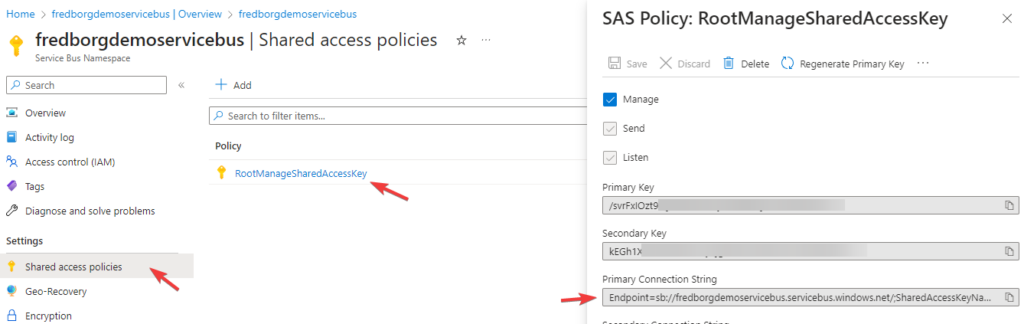
We will now need a connection string to our Service Bus, so head back to your Azure portal and head to Shared access policies click on the RootManageSharedAccessKey and copy the value from the Primary Connection String.
Head back to Visual Studio and open the local.settings.json and add your connection string:
{
    "IsEncrypted": false,
  "Values": {
    "AzureWebJobsStorage": "UseDevelopmentStorage=true",
    "FUNCTIONS_WORKER_RUNTIME": "dotnet",
    "ServiceBusConnectionstring": "Endpoint=sb://fredborgdemoservicebus.servicebus.windows.net/;SharedAccessKeyName=RootManageSharedAccessKey;SharedAccessKey={KEY}"
  }
}
Next change your function code to look as follows:
using System;
using System.IO;
using System.Threading.Tasks;
using Microsoft.AspNetCore.Mvc;
using Microsoft.Azure.WebJobs;
using Microsoft.Azure.WebJobs.Extensions.Http;
using Microsoft.AspNetCore.Http;
using Microsoft.Extensions.Logging;
using Newtonsoft.Json;
using Azure.Messaging.ServiceBus;

namespace SendMessageToServiceBus
{
    public static class Function1
    {
        [FunctionName(nameof(SendMessage))]
        public static async Task<IActionResult> SendMessage(
            [HttpTrigger(AuthorizationLevel.Function, "get", "post", Route = null)] HttpRequest req,
            ILogger log)
        {

            string name = req.Query["name"];
            string requestBody = await new StreamReader(req.Body).ReadToEndAsync();
            dynamic data = JsonConvert.DeserializeObject(requestBody);
            name = name ?? data?.name;

            string connectionstring = Environment.GetEnvironmentVariable("ServiceBusConnectionstring");

            ServiceBusClient serviceBusClient = new ServiceBusClient(connectionstring);

            var sender = serviceBusClient.CreateSender("demo");

            ServiceBusMessage message = new ServiceBusMessage(requestBody);

            await sender.SendMessageAsync(message);

            string responseMessage = string.IsNullOrEmpty(name)
                ? "This HTTP triggered function executed successfully. Pass a name in the query string or in the request body for a personalized response."
                : $"Hello, {name}. This HTTP triggered function executed successfully.";

            return new OkObjectResult(responseMessage);
        }
    }
}
Where the line var sender = serviceBusClient.CreateSender(“demo”) tells the function which queue it should send its request to, and the string connection string = Environment.GetEnvironmentVariable(“ServiceBusConnectionstring”); gets our connection string from the local.settings.json file. If you now try to run your function, take your URL and call it from your REST program of choice, my URL looks as follows:
POST: http://localhost:7054/api/SendMessage
with payload:
{
  "name": "This is a message"
}
This will add a new message to your job queue in your service bus in the Azure portal.

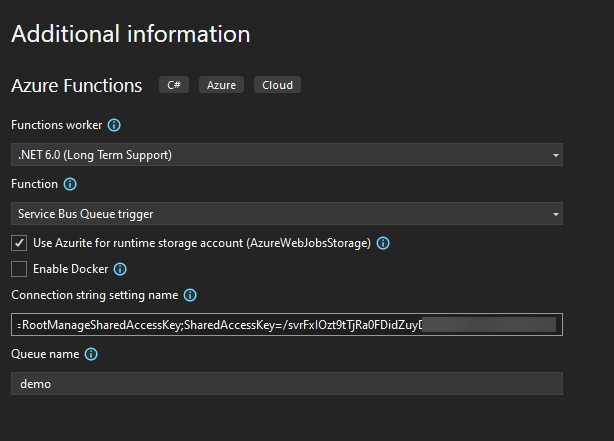
And if you call it again a new message will be added, next we need to add a receiver, in my case I will again use an Azure function. When creating your Azure Function you can choose the trigger type Service Bus Queue trigger which will let you set up your Connection String and Queue Name.
This will create a function that logs our messages I have changed my code to the following:
using System;
using Microsoft.Azure.WebJobs;
using Microsoft.Azure.WebJobs.Host;
using Microsoft.Extensions.Logging;

namespace Receiver
{
    public class Function1
    {
        [FunctionName(nameof(Run))]
        public void Run([ServiceBusTrigger("demo", Connection = "ServiceBusConnectionstring")]string myQueueItem, ILogger log)
        {
            log.LogInformation($"C# ServiceBus queue trigger function processed message: {myQueueItem}");
        }
    }
}
When I run this function it will receive any messages that we have in our queue.

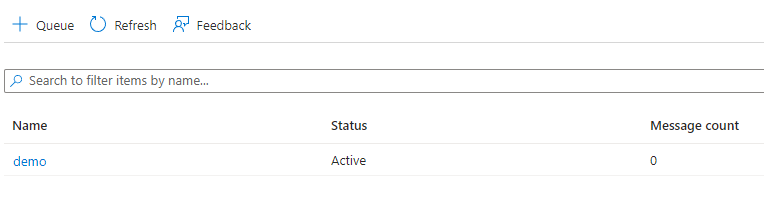
And if we look in our Azure Portal the message count is now 0.
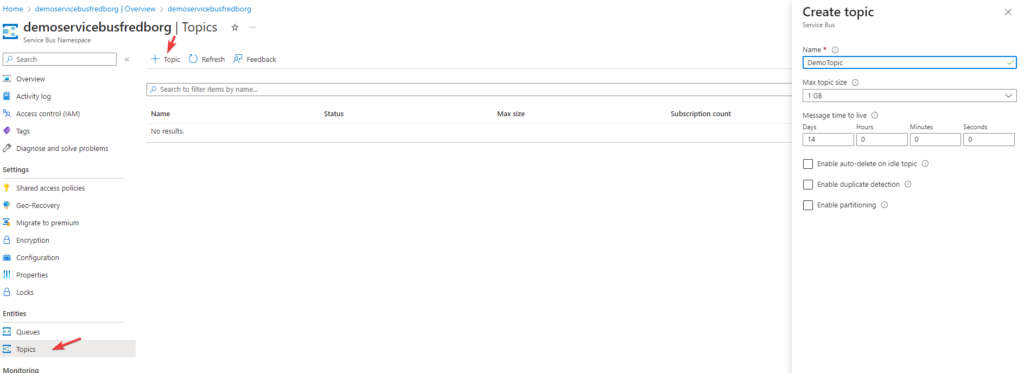
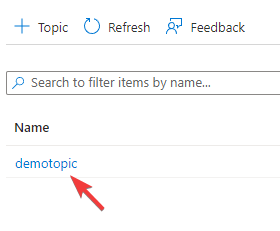
Using Topics you need to create a Topic in Azure Portal
The code for sending messages to a topic is the same, the only difference is that you pass your topic name instead of the queue name
var sender = serviceBusClient.CreateSender("demotopic");
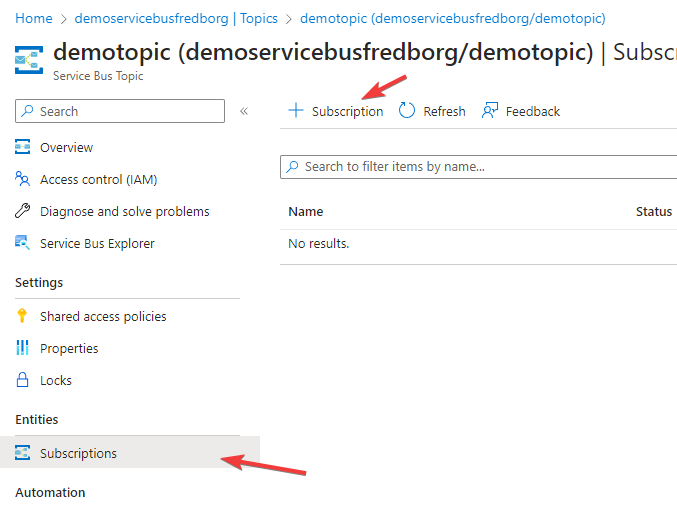
You also need to create a subscription, to do this click on your topic and choose subscription:

To receive a receiver create an Azure function with the trigger Service Bus Topic trigger
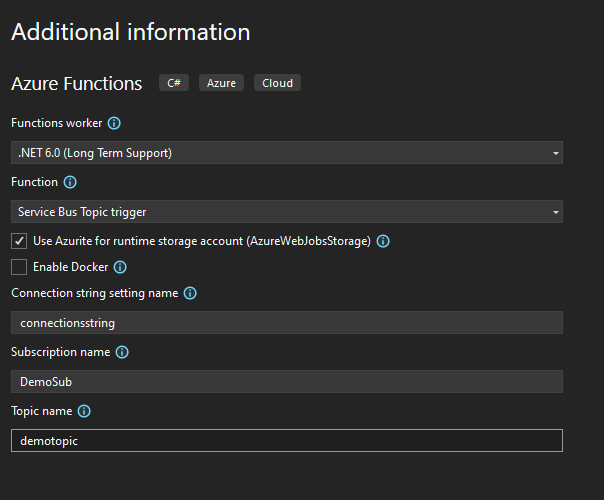
And the code is very similar to our Message queue except it takes our subscription and topic.
using System;
using Microsoft.Azure.WebJobs;
using Microsoft.Azure.WebJobs.Host;
using Microsoft.Extensions.Logging;

namespace TopicReciever
{
    public class TopicReceive
    {

        [FunctionName(nameof(Run))]
        public void Run([ServiceBusTrigger("demotopic", "DemoSub", Connection = "ServiceBusConnectionstring")] string mySbMsg, ILogger log)
        {
            log.LogInformation($"C# ServiceBus topic trigger function processed message: {mySbMsg}");
        }
    }
}
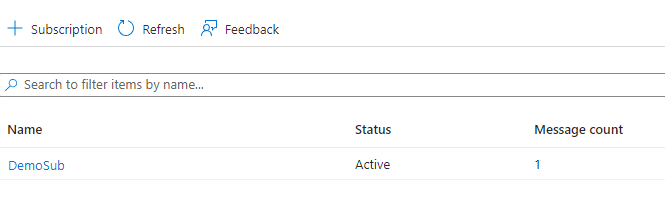
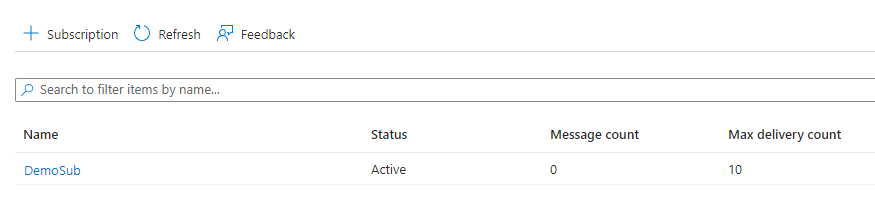
So if I send a message to our Topic then my subscription will say that it has one message count:
And then when I run my Topic Receiver that message will be read
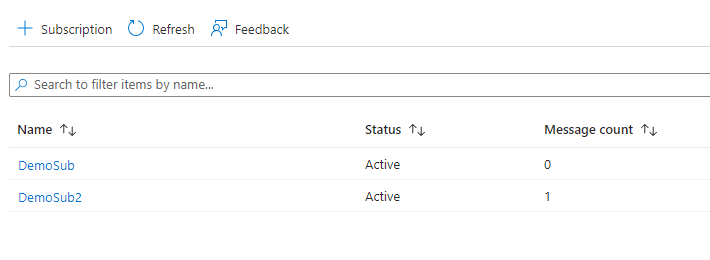
If I add another subscription and send a new message while only listing to DemoSub, you will see that I only read the messages for my subscription, leaving the message in the other subscription until they are ready to receive messages.
And that is how Azure Service Bus works, this, of course, was a very simple example, but when used correctly then this can make many of our integration more flexible, I have decided not to write any AL code in this blog post because the code is the same as any other code we would write to call an HTTP triggers Azure Function so that was it for this post until next time stay safe.