
Manual deployments are slow, difficult to reproduce, and surprisingly easy to get wrong. A missed permission or slightly different configuration can leave two supposedly identical environments behaving differently. Infrastructure as code solves that problem by making the infrastructure itself versioned, repeatable, and deployable through the same workflow as application code.
In this guide, we will build an Azure deployment using Bicep and Azure DevOps. The finished pipeline provisions an Azure Function, an Azure Service Bus, monitoring resources, and the managed identity permissions needed for the Function to communicate with the Service Bus. We will also use an AI coding agent to accelerate the initial implementation, while still reviewing and taking responsibility for the generated code.
All code can be found on my GitHub: https://github.com/dfredborg/IaC
Prefer to watch the complete walkthrough? Embed the accompanying video here:
Why infrastructure as code?
Infrastructure as code, usually shortened to IaC, describes cloud resources in source-controlled files instead of relying on a sequence of portal clicks. Once the deployment is code, you can:
- create the same environment repeatedly;
- review infrastructure changes through pull requests;
- deploy development, test, and production environments consistently;
- tear resources down and recreate them when necessary;
- track who changed what and when;
- let developers participate in operations without depending on undocumented manual steps.
For this example, Bicep is the infrastructure language and Azure DevOps provides the repository and deployment pipeline. The same principles apply to other cloud providers and IaC tools.
What we are deploying
The demo creates a small event-driven foundation:
- an Azure Function App running .NET isolated;
- an Azure Service Bus namespace and queue;
- a system-assigned managed identity for the Function App;
- Azure Service Bus Data Sender and Data Receiver role assignments;
- Application Insights and a Log Analytics workspace;
- an Azure DevOps YAML pipeline that deploys the Bicep templates.
The key point is that all of this is created from the repository. The portal becomes a place to verify the result, not the place where the deployment is defined.
1. Create an Azure DevOps service connection
The Azure DevOps pipeline needs an identity that can deploy resources into Azure. In the project settings, open Service connections and create an Azure Resource Manager connection.
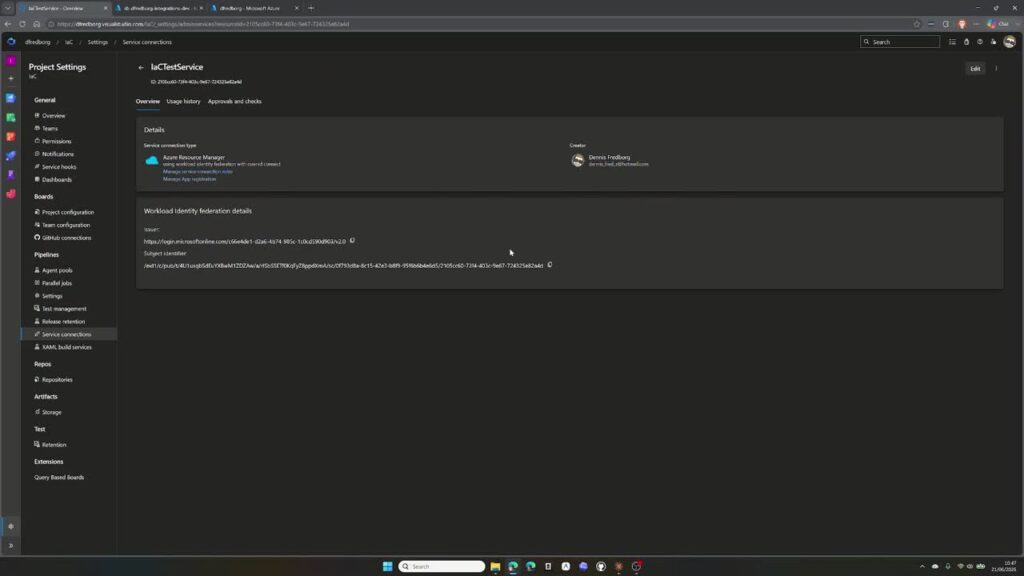
The Azure Resource Manager service connection used by the deployment pipeline.
The recommended workload identity federation option creates an app registration in Microsoft Entra ID without relying on a client secret that must be rotated. Select the correct subscription and decide whether the connection should cover one resource group or the whole subscription. For a tightly controlled production setup, scope the connection as narrowly as the deployment permits.

2. Grant only the permissions the pipeline needs
Azure DevOps normally assigns the service connection the Contributor role. Contributor can create, modify, and delete resources, but it cannot create role assignments. That becomes important when the Bicep deployment must grant the Function App access to Service Bus.
For this demo, the service connection also receives User Access Administrator. This permits the pipeline to create the managed identity role assignments defined in Bicep.
Contributor deploys the resources; User Access Administrator allows the pipeline to create role assignments.
Security note: User Access Administrator is a powerful role. Scope it to the smallest practical level, review why it is required, and use separate service connections for separate environments. Do not grant broad permissions simply to make a failing pipeline pass.
3. Structure the Bicep deployment
A maintainable Bicep repository usually has a small orchestration file and focused modules for individual services. In this example, the main deployment coordinates modules for the Function App and Service Bus, then creates the role assignments that connect them.
The infrastructure is split into readable Bicep modules instead of one large template.

A simplified repository might look like this:
infra/
├── main.bicep
├── parameters/
│   └── dev.bicepparam
└── modules/
    ├── function-app.bicep
    └── service-bus.bicep
azure-pipelines.yml
Values that vary between environments—resource group name, region, resource names, pricing tiers, and runtime configuration, should be parameters rather than hard-coded values. This makes the same modules reusable for development, test, and production.
The role assignment portion conceptually connects the Function App identity to Service Bus:
// Simplified example: use the built-in role definition IDs in your project
resource senderRole 'Microsoft.Authorization/roleAssignments@2022-04-01' = {
  name: guid(serviceBus.id, functionApp.identity.principalId, 'sender')
  scope: serviceBus
  properties: {
    principalId: functionApp.identity.principalId
    principalType: 'ServicePrincipal'
    roleDefinitionId: subscriptionResourceId(
      'Microsoft.Authorization/roleDefinitions',
      serviceBusDataSenderRoleId
    )
  }
}
The receiver assignment follows the same pattern with the Azure Service Bus Data Receiver role. The role definition IDs should be parameters or well-named variables so reviewers can understand what is being granted.
4. Create environments and initialize the repository
Create an Azure DevOps environment such as dev, initialize the project repository, and clone it locally. Even if the first pipeline uses only development, establishing an environment structure early makes it easier to add approvals and separate configuration later.
At this stage the repository may contain little more than a README. That is enough to start an AI-assisted implementation.
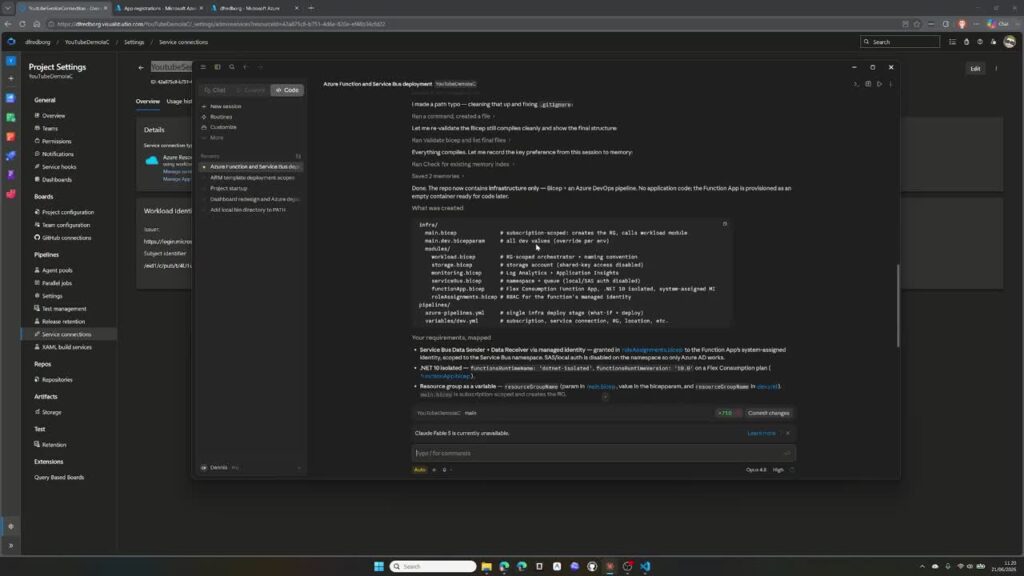
5. Use an AI coding agent to draft the IaC
Infrastructure code is a good fit for coding agents because the desired result can be described in concrete terms. The agent can generate the file structure, Bicep modules, parameter files, and YAML pipeline. The quality of the result, however, depends heavily on the prompt.

An AI coding agent can draft the infrastructure and pipeline directly inside the repository.
A useful prompt should state:
- which Azure resources to create;
- that Bicep and Azure DevOps YAML must be used;
- the service connection name and target subscription;
- the managed identity roles required on Service Bus;
- the Function App runtime and hosting requirements;
- which decisions must be parameters;
- that the task covers infrastructure only, not application code.
Create Bicep infrastructure for an Azure Function and Azure Service Bus, deployed with an Azure DevOps YAML pipeline. Enable a managed identity on the Function App and grant it Azure Service Bus Data Sender and Data Receiver. Make resource names, region, resource group, environment, and pricing decisions configurable. Generate infrastructure only; do not generate Function application code.
That final boundary matters. During the demo, the agent initially began creating application code as well. Stopping it and clarifying the scope fixed the problem quickly. Agents are productive, but they are not mind readers.
6. Review the generated files before committing
Once the agent finishes, inspect every generated file. Confirm that resource names are deterministic, parameter values are appropriate, dependencies are correct, and role assignments target the intended scope.
Generated code still needs a human review before it belongs in the repository.
In particular, check for:
- unexpected resources or application code;
- hard-coded subscription IDs, secrets, or environment-specific names;
- overly broad role assignments;
- unsupported runtime or API versions;
- missing outputs and dependencies;
- pipeline triggers that could deploy unintentionally.
Commit through a feature branch and pull request where possible. Infrastructure changes deserve the same review discipline as application changes—arguably more, because they can affect security, availability, and cost.
7. Create and run the Azure DevOps pipeline
Create a new pipeline from the repository’s existing YAML file. The pipeline references the service connection, targets the desired subscription and resource group, and runs the Bicep deployment.
# Simplified deployment step
- task: AzureCLI@2
  inputs:
    azureSubscription: $(serviceConnection)
    scriptType: bash
    scriptLocation: inlineScript
    inlineScript: |
      az deployment group create \
        --resource-group "$(resourceGroupName)" \
        --template-file infra/main.bicep \
        --parameters infra/parameters/dev.bicepparam
On the first run, Azure DevOps may ask for permission to use the service connection or environment. Review the request and grant it only to the intended pipeline.
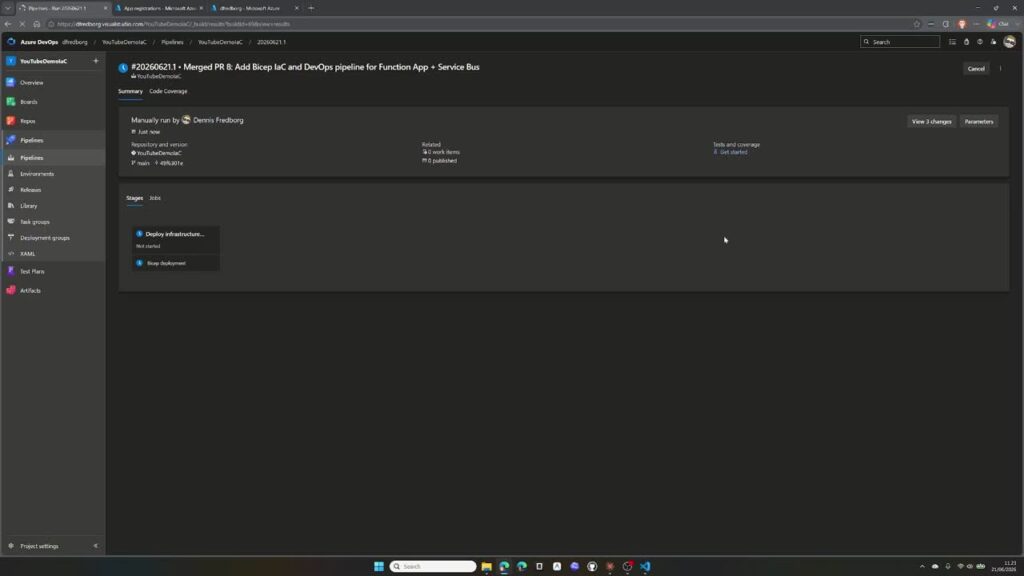
The completed Azure DevOps pipeline reports a successful infrastructure deployment.
8. Verify the deployment in Azure
After the pipeline completes, use the Azure portal to verify; not manually recreate; the result. The new resource group contains the Function App, Service Bus, Application Insights, and Log Analytics resources produced by the templates.
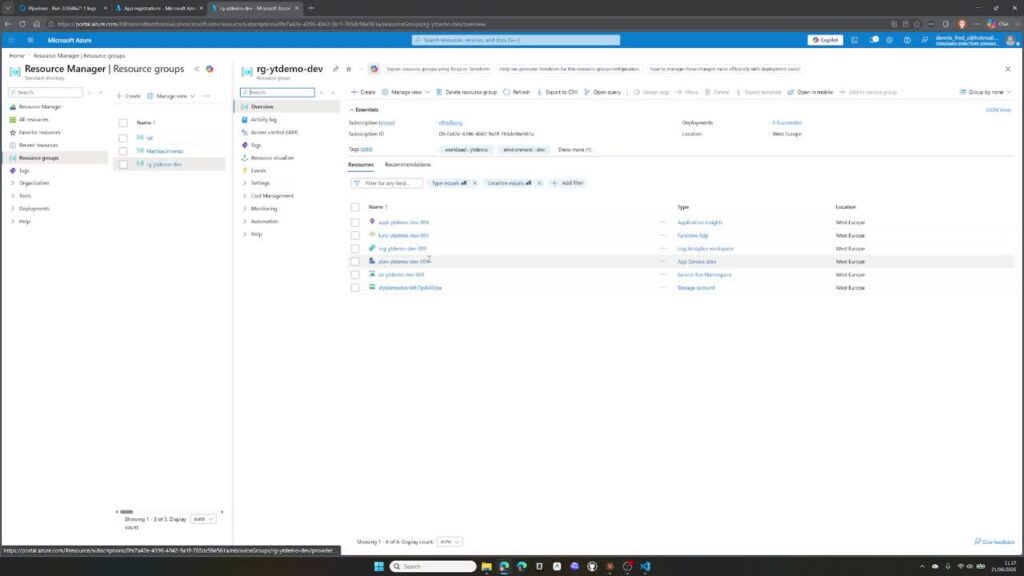
The resource group created by the Bicep deployment.
Next, inspect Service Bus access control. The Function App’s managed identity should have both the Data Sender and Data Receiver roles. This proves that the service connection had enough permission to create role assignments and that Bicep connected the resources correctly.
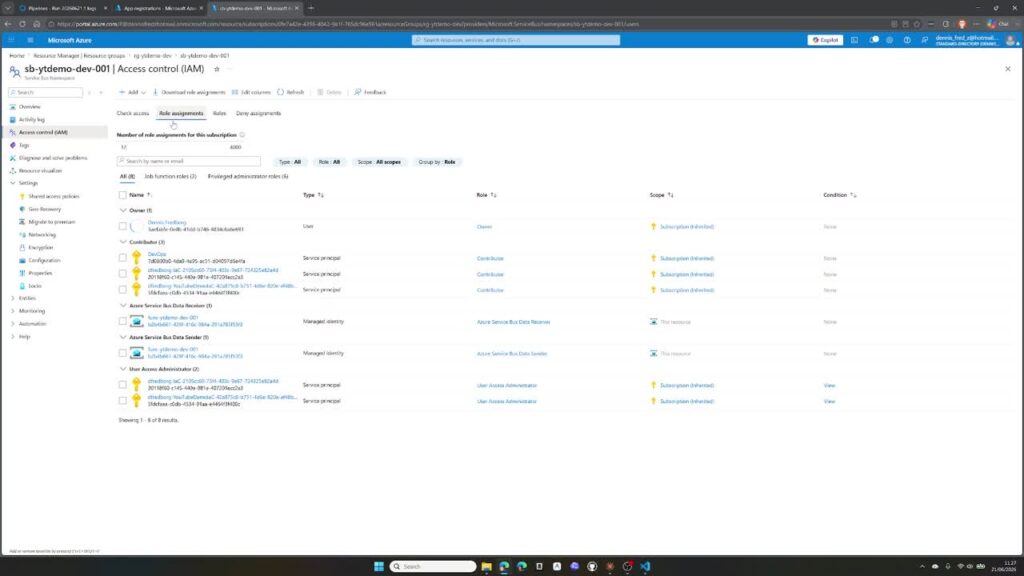
The Function App identity receives its Service Bus permissions through the deployment.
Finally, check the Function App runtime and confirm that no unwanted functions were generated. The infrastructure should be ready for application code, but the IaC task itself should not invent that application.

The deployed Function App uses the requested .NET isolated runtime.
The result: a repeatable environment in minutes
The AI-assisted code generation took only a few minutes, including one correction to the prompt. Configuring the Azure identity and permissions took a little longer, but the complete pipeline and deployment were running in roughly twenty minutes.
The bigger win is not the first deployment. It is every deployment after it. The repository now describes how the environment should look. A change to the infrastructure happens in Bicep, goes through review, and is deployed by the pipeline. Nobody needs to remember which portal blades to open or which checkboxes were selected last time.
AI helps, but you remain responsible
AI coding agents remove a great deal of repetitive work, especially when creating declarative templates. They do not remove the need to understand Azure fundamentals. You still need to know what managed identities do, how role scopes work, why a resource needs a particular permission, and what the generated deployment will cost.
Read the generated files. Review them. Test them in a safe environment. Never commit infrastructure code merely because an agent says it is finished. The person who deploys the code remains responsible for the result.
Once that discipline is in place, infrastructure as code becomes one of the most powerful ways to make Azure delivery faster, safer, and genuinely repeatable.